
Nursery Progress: Changing Table Transformation
9:44 AMThe biggest project I accomplished during my week of vacation was painting the changing table. This project was a little scary for me. First of all, it involved real paint, not spray paint. Secondly it involved an antique dry sink. Yes, rather than purchase the expensive changing table I'd been eyeing, I encountered an incredibly talented saleswoman at an antiques/thrift shop who suggested the dry sink as a changing table. I suppose in hindsight I wasn't really a tough sell. I was in awe of everything in that store and wanted desperately to buy something. We'd found out new baby was a girl and the modern changing table I wanted fit better in my 'boy' room--the one I'd been unconsciously designing in my head while convincing myself I wasn't convinced that it was a boy. :) Anyway, I loved the idea of using something completely out of the ordinary and I loved the price-- $80 which I bargained down to $70. Apparently dry sinks are one of the easiest "antiques" to replicate and fake so I have absolutely no idea if it's a real antique. Lucky for me, I don't really care. But the fact that it was this knotty pine and had a...country look to it was the scary part. I'm all about modern, or shabby chic, or even contemporary/traditional, but "country" is the one style I am not a big fan of. Since I constantly am perusing etsy and various design blogs however, I saw it's potential to be more shabby chic or even farmhouse chic. [Note to self: anything sounds cooler with "chic" added to it]. I also have been desperate to try distressing furniture (I've always loved it, but my recent obsession is mostly due to these gals. Check out better pictures of their stuff in this post over at HowDoesShe) and thought this would be the perfect piece to try that on. A fun color, a little distressing, and a cool anthropologie knob would do the trick right?!
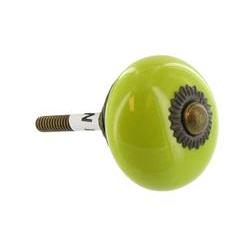 |
| Hobby Lobby Version |
 |
| Anthropologie Version |
 I won't give you the play by play because it was really quite simple. But here are a few things I learned. I'm new to painting furniture so I didn't know about zinsser. But now I do. It totally saves you from the sanding part which is really the worst part. I'm learning sometimes it still helps to sand for other reasons than paint adhesion but for this project I got to skip that part. I also have learned to prime, prime, prime. So I did. I also tinted my primer which totally helped. Not only did it help with fewer coats of the color paint but it also helped me see where the wood (specifically around the knots) was still bleeding through. After 3 coats of primer and 2 coats of Sherwin Williams "Belize" (tinted 25% darker), I was almost done. Next came sanding. I'm not gonna lie; I was scared. The thought of sanding paint off of a piece that you just spent hours painting is quite scary. But I conquered my fear and did it anyway. I used my father in law's sander again, which was easier than sanding by hand (though by hand is totally doable). And as the fancy farmgirls say, it's quite addicting!! It looked so much cooler after the sanding. I did mess up at one point but I just painted over it and you couldn't even tell! That's the beauty of distressing. Obviously more is less since you can always go back and sand some more but re-painting may be tricky. Lastly, I added this cute little knob from anthro. Ok, I'm totally lying. Rather than spend the $8 + shipping for the knob at anthro, I scored this just-as-cute version at Hobby Lobby for $2.99! So that was it. Well technically that's not it--I still have to poly it to resist scratching. But that's it for now. (I'm trying to convince husband to poly everything I'm painting so I don't have to. I'll let you know how it goes). Now for the finished result:


3 comments
you go girl!! looks really pretty :)
ReplyDeleteLove this! The knobs are perfect and the piece looks fabulous.
ReplyDeleteHi ladies,
ReplyDeleteI didn't see a contact email on your site... I'm a contributor at Apartment Therapy and would love to feature this before and after. Can you contact me at bethc@apartmenttherapy.com if you are interested? Thanks!